How to do MORE with LESS Animations
In Unreal we have been able to retarget animations before to be able to share them between characters. That being said that was a somewhat esoteric process that not always yield the results one wanted.
Unreal 5 introduced IK Retargeting, which although a little bit more laborious to setup, then gives us much more control on how our animations look, and it also comes with some neat features.
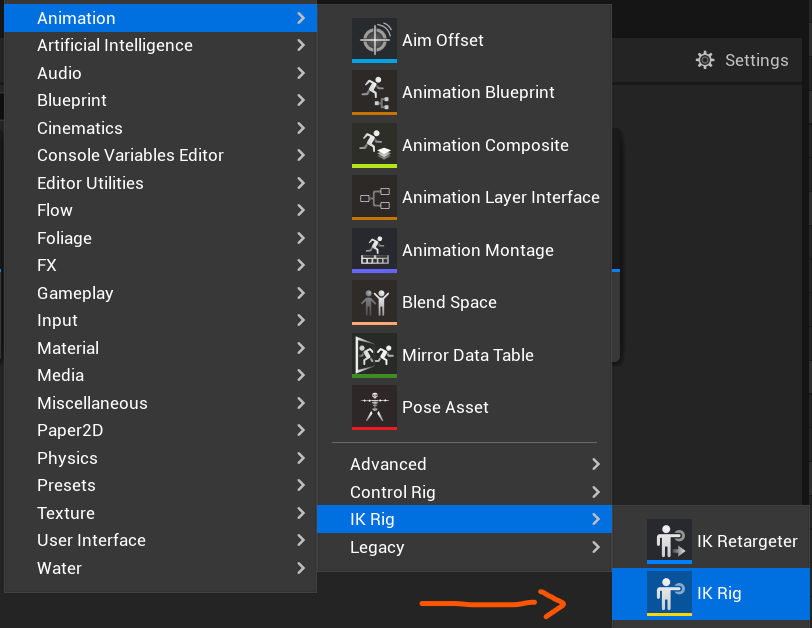
Creating an IK Rig
Before we can use the IK Retargeter we must first create a new asset called an IK Rig. This asset will tell the system information about our skeleton, such as what do we consider the spine, legs and hands, as well as how we want to handle the IK Retarget process.

We will need to select the skeleton and then we will be able to open the IK Rig asset.

Time to Setup the IK Rig data
Now that we have the rig asset we have to do several things.
The first one is to right click on the pelvis and set that as our retarget root.
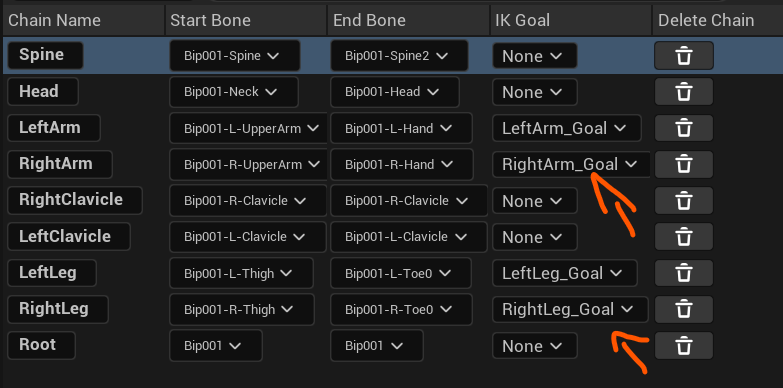
The second things is that we will go to the bottom-right corner and create the retarget chains. This is how the systems know what this character spine, legs or arms are. I recommend picking a naming convention and always use that but that is not a requirement.
If we are created the spine chain we will name it Spine, then as start bone select the first bone of the spine and as last bone select the last bone of the spine.
Pro Tip: If you select the bones you want to use on the left inspector when adding a new chain, the start and end bone will be automatically filled.
We will need to do this for all our bone chains, it can be time-consuming, but it’s something that needs to only be done once per skeleton.
Selecting and Using IK Solvers
If we want to use the full potential of the IK Retageter the next step that we will do is select a IK Solver.
There are many that we can use, but usually we will want to go with the Full Body IK solver.

Once selected we need to right-click a bone while having the solver selected and mark it as the solver root bone ( we will use the pelvis as well for that ).
Then we will select each of the extremities, right-click them as well and create a new IK Goal.
Finally on the the chains settings we will set the Goals with their corresponding chains.

The fun starts, how to Retarget Animations
To do this we first need to create another asset, the IK Retargeter ( it’s in the same Animation section as the IK Rig ).
It will ask you which IK Rigs you want to use to transfer animations from one another and after that you can open it. It has lots of settings, but what we care about is on the bottom right corner and these are the animations we can test.

If everything went right you will be able to select any animation from the original skeleton and transfer it to the new skeleton. If things don’t go well, don’t worry, it’s a little bit tricky to setup so ping me at Twitter or via mail, and I can try to help you.
This is only scratching the basics of what the IK Retargeter can do, as it has tons of settings to play with and even supports Realtime Retargeting, but we may touch this in a future issue of the Newsletter or a future Article.
I hope this will help you re-use animations in your project!

%20(631%20%C3%97%20156%20px).png)


